Whether you want to capture an image or save information, knowing how to take a screenshot can come in handy. Taking a screenshot on your laptop is simple, and there are many ways to do it.
In this guide, we’ll go over six methods for taking screenshots on a Windows laptop. We’ll show you how to take a full or partial screenshot.
We’ll also show you how to use keyboard shortcuts and the snipping tool.
Screenshots are not only convenient but are necessary to getting work done faster. You see, while different operating systems use different methods, the basic principle remains the same.
Today in this article, I’ll show you how to take a screenshot on your Windows laptop.
Table of Contents
1. Full-Screen Screenshot With Keyboard Shortcuts
This first method is a quick and easy way to capture your entire screen with keyboard shortcuts.
Capturing your entire screen means that everything open will be in the screenshot, including the windows taskbar and any open windows. So, close any windows you don’t want to appear in the screenshot.
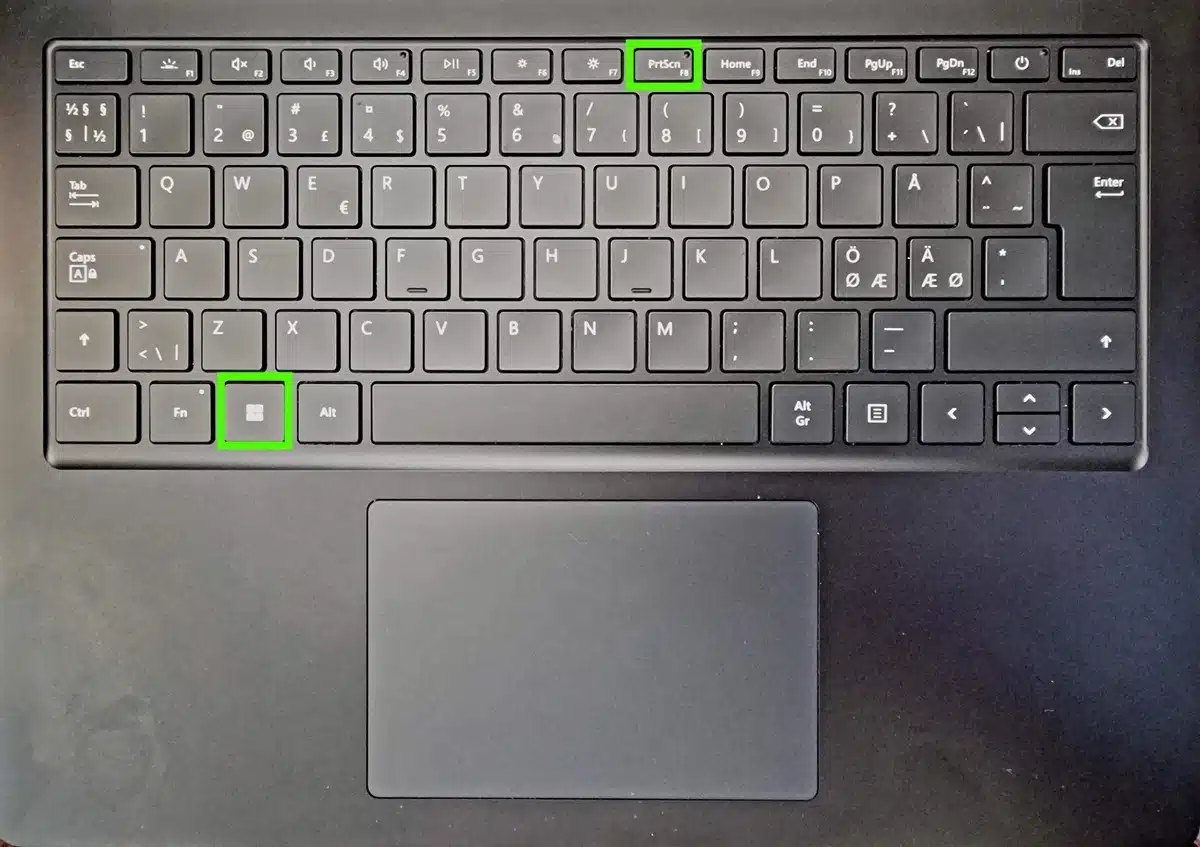
Locate the print screen key, which should be on the upper right side of your keyboard. Depending on your laptop, this key is usually named “PrtScn,” “PrntScrn,” or something along those lines.
See picture below for an example.
Next, locate the windows key, which has the windows sign and is at the bottom right side of the keyboard.
Now, simultaneously press the windows and the PrintScreen keys. You will see your screen going dim for a few seconds to indicate the screen capturing.
Your screenshot will be saved as an image (PNG format). To find the screenshot, go to the “Pictures” folder on your device. There, you’ll find a folder called “Screenshots” with all the screenshots you’ve taken.
What If I Don’t Have the Print Screen Key?
Some laptops don’t have the print screen key on them. If this is your case, don’t worry; there’s another method for screen printing.
In this method, you’ll use three keys: Fn key, Windows key, and Space bar. Press those three keys simultaneously, and you’ll take a screenshot. You’ll also find it in the Screenshots folder.
2. Copying the Screen
You might want to copy and paste the screenshot without saving it on your PC and taking up space.
In this method, we’ll show you how to copy a screen so you can paste it into an email, a document, or another file.
Copy the Entire Screen
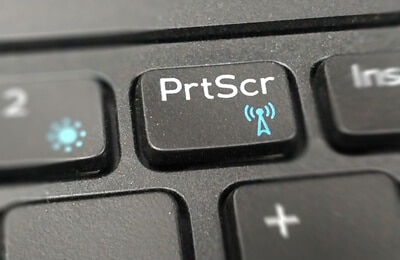
To copy your screen, press the Print Screen key without the windows key. What this does is that it copies the screen to your clipboard so you can paste it to your desired location. See picture above to see an example of the “Prt Sc” key.
Once you’re where you want to paste the screenshot, right-click and select paste, or press Ctrl + V. The screenshot will be pasted and appear right away.
Copy the Active Window Only
In this method, you’ll only capture one window rather than your entire screen. First, make sure the window you want to copy is at the front.
Then, press Alt and Print Screen together, which will only copy your active screen. Now, you can paste the screenshot to your desired location.
Quick Tip
To bring up the clipboard and view the screenshots you’ve copied, press the Windows key + V. This will bring up your clipboard at the bottom right corner of the screen, and you can view your screenshots.
3. The Snip and Sketch/Snipping Tool
Windows 10 and 11 come with a tool that allows you to edit and customize the screenshot.
Windows 10
The name of this tool for windows 10 is “Snip and Sketch,” You can either activate the tool manually or use a keyboard shortcut.
To open the tool manually, type “Snip and Sketch” in the search in the taskbar. Then, the app will open, and you can click on “New” at the top left corner to take a new screenshot.
As for the keyboard shortcut, press the Windows key + Shift + S, then your screen will dim, and a small menu bar will appear on top.
This menu will give four options to choose from:
- Rectangular Snip: This allows you to create a rectangle around the area of the screen you want to capture.

- Freedom Snip: This allows you to draw freehand using your cursor to create a specific screenshot.

- Window Snip: This will only capture the window of your choice.

- Full-Screen Snip: This will capture an image of your entire screen.

Now, here’s how to use each of those four options:
- Rectangular Snip: Click and drag your cursor to draw a rectangle around your preferred area. The screenshot will be captured as soon as you remove your finger from the click button.
- Freedom Snip: Click and move the cursor to draw a shape around the area you want to screenshot.
- Window Snip: Click on the Window snip option on the menu bar, then click on the screen with the window you want to capture.
- Full-Screen Snip: Click on the full-screen snip in the menu bar and you’ll capture the entire screen instantly.
After you choose your desired method and capture the screenshot, it will be copied to your clipboard. You’ll instantly get a notification on the bottom right corner of your screen to confirm that the screenshot is saved.
Now, click the notification to open the Snip and Sketch app on your device. On this app, you can share, edit, and save screenshots. Once you’re done editing, click Save Snip and you can save your screenshot as a PNG or JPEG format.
Windows 11
The screenshot tool was renamed “Snipping Tool” for Windows 11. It flaunts WinUi controls, along with a new look. Microsoft has also added Fluent Design, rounded corners, and new iconography for the app.
To use the snipping tool, follow the same method as in Windows 10.
The options you’ll get in the menu bar are the same as Windows 10, with slightly different names.
- Rectangular Mode: To draw a rectangle around the desired area
- Window Mode: To screenshot one window only
- Full-Screen Mode: To screenshot an entire screen
- Free-Form Mode: To draw a free-hand screenshot
Once you’re in the Snipping Tool app you can use the editing tools such as the highlighter or pen. When you’re done editing, save the snip to your desired location.
4. Power + Volume-Up Buttons
Some Windows laptops, such as the Microsoft Surface, have power and volume buttons attached to the screen (just like a tablet or phone).
If you have such a device, there’s an easy method to take a screenshot. Simply press both the power and the volume-up buttons simultaneously. This will instantly take a screenshot and save it to the Screenshots folder.
5. Using the Game Bar
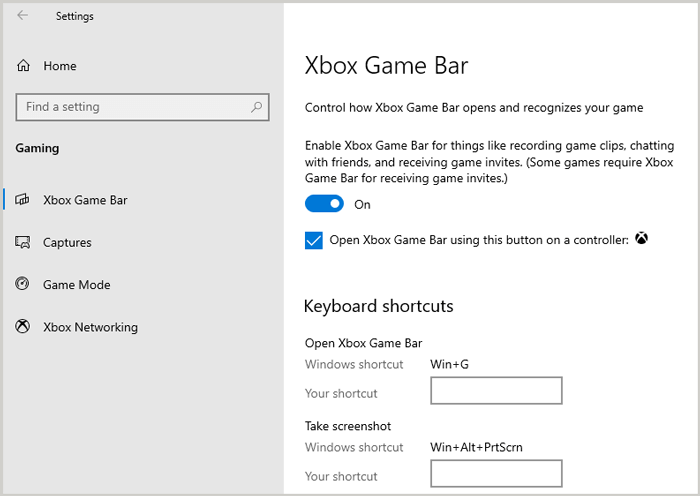
The Game Bar is an overlay screenshot toolbar you use to capture screenshots of Windows 10 apps and when playing a game. Press Windows key + G to display Game Bar. Click on the Capture icon and then click Camera to take a screenshot.
You can also press Windows + Alt + PrtScn buttons to capture a screenshot of the active window. A notification will pop up saying the screenshot has been saved.
If your Game Bar doesn’t open, go to the Start menu, click on Settings, select Gaming/Xbox Game bar, and then toggle on “Record game clips, screenshot, and broadcast using the Game bar.” From there, you can also set your own keyboard shortcut for opening Game Bar and taking a screenshot.
6. Screenshot Using a Third-Party App
Apps are a great way to take screenshots because they contain a lot of editing features that you won’t find even in Snipping Tool.
We recommend TinyTake, which is a screen-capturing and video-recording app that has many useful features and custom shortcuts. It also allows you to annotate and share your screenshots with anyone.
Moreover, you can copy the images from the app to your clipboard so you can instantly paste them to any location, or you can save them on your device.
To start using TinyTake, go to their website and download the app. Once inside the app, you’ll see a green button on the top-right corner called “Capture.” This button will give you a drop-down menu with many options for screenshotting and editing.
The app is also user-friendly and easy to navigate so you won’t have a problem learning to use it.
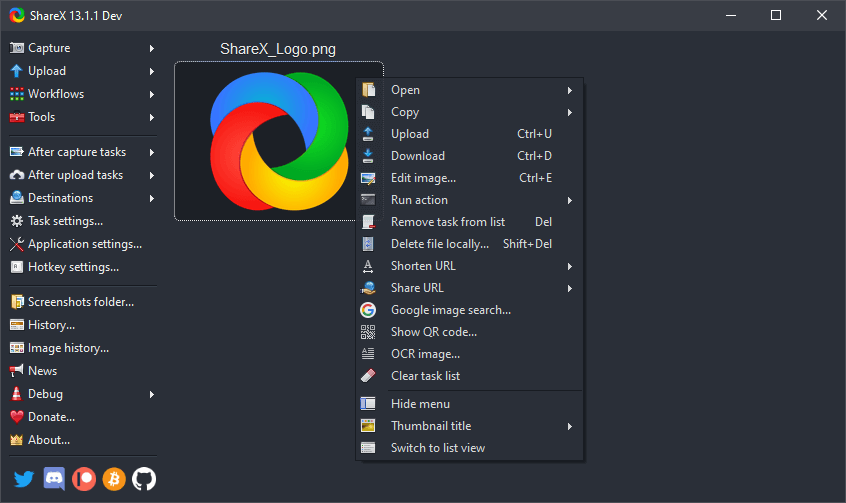
ShareX is a good screenshot utility. It is a completely free, open-source app with several ways of taking screenshots. It is the most feature-packed screenshot tool of any free screen capture tool you can get. It has a built-in editor and keyboard shortcuts for taking screenshots.
Greenshot is an open-source tool that for several years was a favorite for many when doing a screen capture. For those of you who need a simple tool, it’s still one of the best.
Lightshot is a free screenshot tool good for simple uses like highlighting stuff, adding arrows and boxes, and even text as well to screen captures. It is available in both Windows and Mac and is recommended to those who don’t do a lot of editing.
7. Windows Steps Recorder
If you want to screenshot several windows in a row, this method is for you.
Windows Steps Recorder will allow you to capture up to 100 different screens in a row and save them in the same document.
How Does It Work?
The way this program works is that it starts a screen recording, and it detects your mouse clicks as you change between windows and takes a screenshot.
To start the process, go to the search bar or press the Windows Key + S to open it. Then, type psr.exe in the search to open the Windows Steps Recorder.
Now, click “Start Record” at the top-left corner of the toolbar. This will start the recorder and will screenshot your next 25 screens as you change between them.
If you want to capture more than 25 screens, you can adjust that in the settings. Select the down arrow on the top-right corner of the toolbar, click on settings, and type the number you want (up to 100) in the “Number of recent screen captures to store” box.
After you’ve chosen your desired number of screens, you can start the recorder again. Click through the different screens you have opened to screenshot each of them.
Once you’re done, click “Stop Record” in the toolbar. The recording will stop, and a new window will open, containing all the screenshots you’ve taken.
Scroll down to view all the screenshots and ensure you captured all the screens you wanted.
Save Your Screenshots
Finally, save all your screenshots in a zip folder by clicking the save button. Choose a location for your file and a name, then click save again.
Now all your screenshots will be saved together, and you can view them in the file where you placed them.
Summary
Taking a screenshot is a useful skill that anyone should learn. The methods in this guide are all quick and easy ways to capture your screen.
Here’s a summary of all the methods that were mentioned:
- Press on Windows Key + PrtScn to capture your full screen.
- Press only the PrtScn key to copy the full-screen or press Alt + PrtScn to copy an active window.
- Use the Snip and Sketch tool for Windows 10 or the Snipping tool for Windows 11 to capture and edit images.
- Press the Power + volume up button together to instantly take a screenshot.
- Use TinyTake App to take screenshots and edit them.
- Use Windows Step Recorder to capture several windows in a row.
Depending on your preference and requirements, you can choose any of the six methods to take a screenshot on your Windows device.


Be the first to comment